Changing Mac Hostnames
1. Open the Terminal
To start, open the Terminal app on your Mac:
- Press Cmd + Space to open Spotlight.
- Type Terminal and press Enter.
2. Change the Primary Hostname
The primary hostname is your Mac’s fully qualified domain name (FQDN), used for network communications.
Command:
sudo scutil --set HostName <new-host-name>
Example:
sudo scutil --set HostName myMac.domain.com
After running the command, you’ll be prompted to enter your admin password.
3. Change the Bonjour Hostname
The Bonjour hostname is the name visible on the local network and typically ends with .local.
Command:
sudo scutil --set LocalHostName <new-host-name>
Example:
sudo scutil --set LocalHostName myMac
This name will be visible to other devices on your local network.
4. Change the Computer Name
The Computer Name is the user-friendly name that appears in Finder and system preferences.
Command:
sudo scutil --set ComputerName <new-name>
Example:
sudo scutil --set ComputerName My MacBook Pro
5. Flush the DNS Cache
After making these changes, it’s recommended to flush your DNS cache to ensure that network services recognize the new names.
Command:
dscacheutil -flushcache
6. Restart Your Mac
To apply all changes, restart your Mac:
- Click the Apple logo in the top-left corner.
- Select Restart.
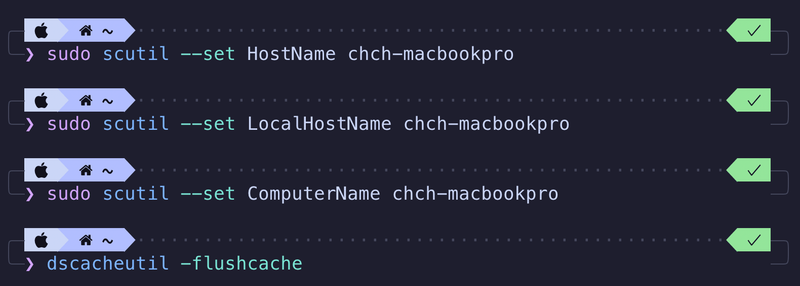
Summary of Commands
Here’s a quick reference of all the commands:
| Action | Command |
|---|---|
| Set primary hostname | sudo scutil --set HostName <new-host-name> |
| Set Bonjour hostname | sudo scutil --set LocalHostName <new-host-name> |
| Set computer name | sudo scutil --set ComputerName <new-name> |
| Flush DNS cache | dscacheutil -flushcache |
Notes
- The primary hostname is used for external network identification (e.g., remote SSH connections).
- The Bonjour hostname is used on the local network (e.g., for AirDrop or file sharing).
- The computer name is the friendly name visible in Finder and System Preferences.